Reference Materials
Register your SAP Fieldglass Worker Account
Before you can enter time in the SAP Fieldglass application, you must register your worker account. You willreceive an email with instructions, a link to the registration page, and a temporary registration code.
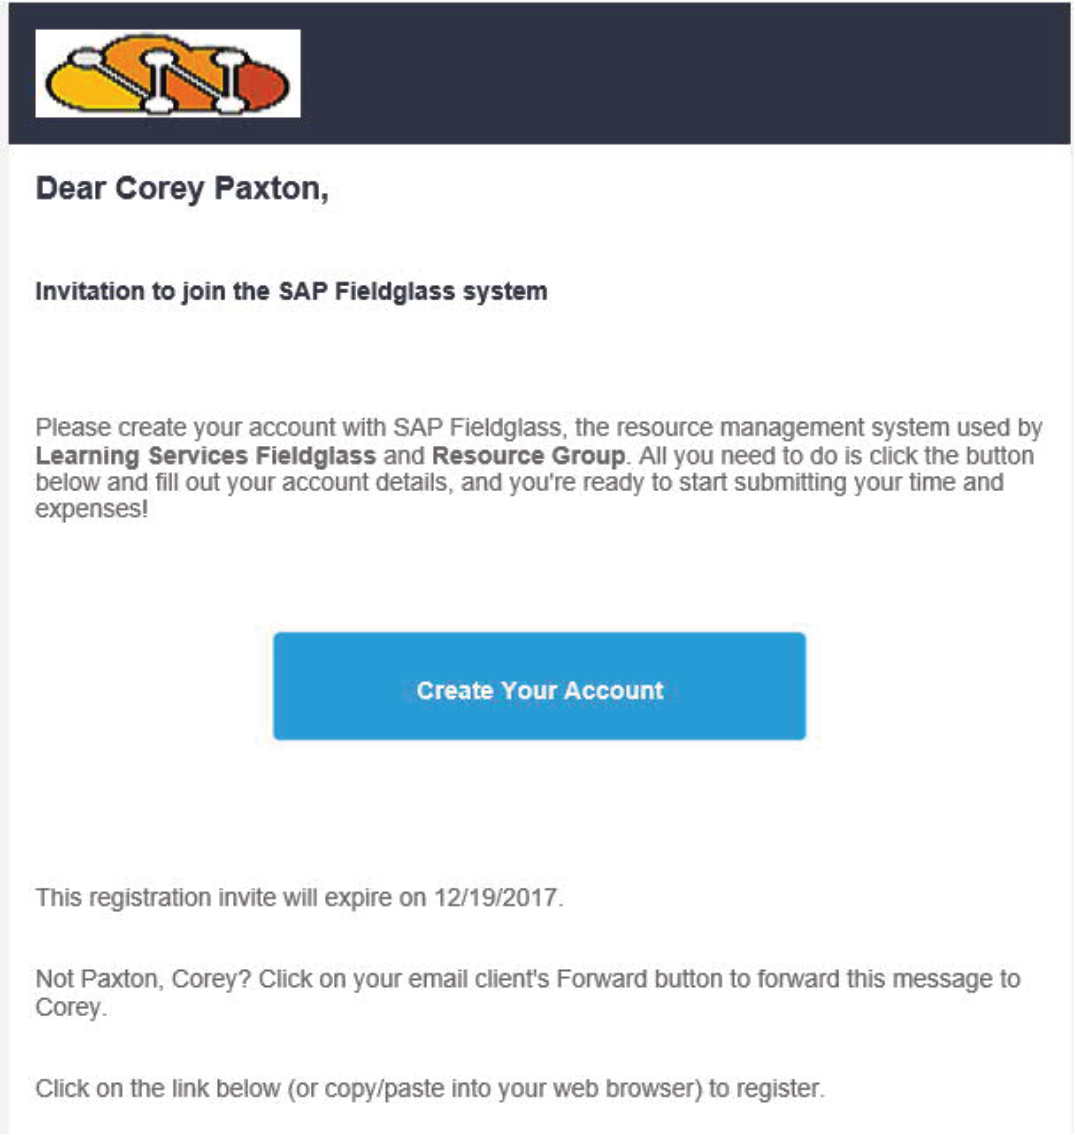
- Click the Create Your Account button to open the Create Your Account page.
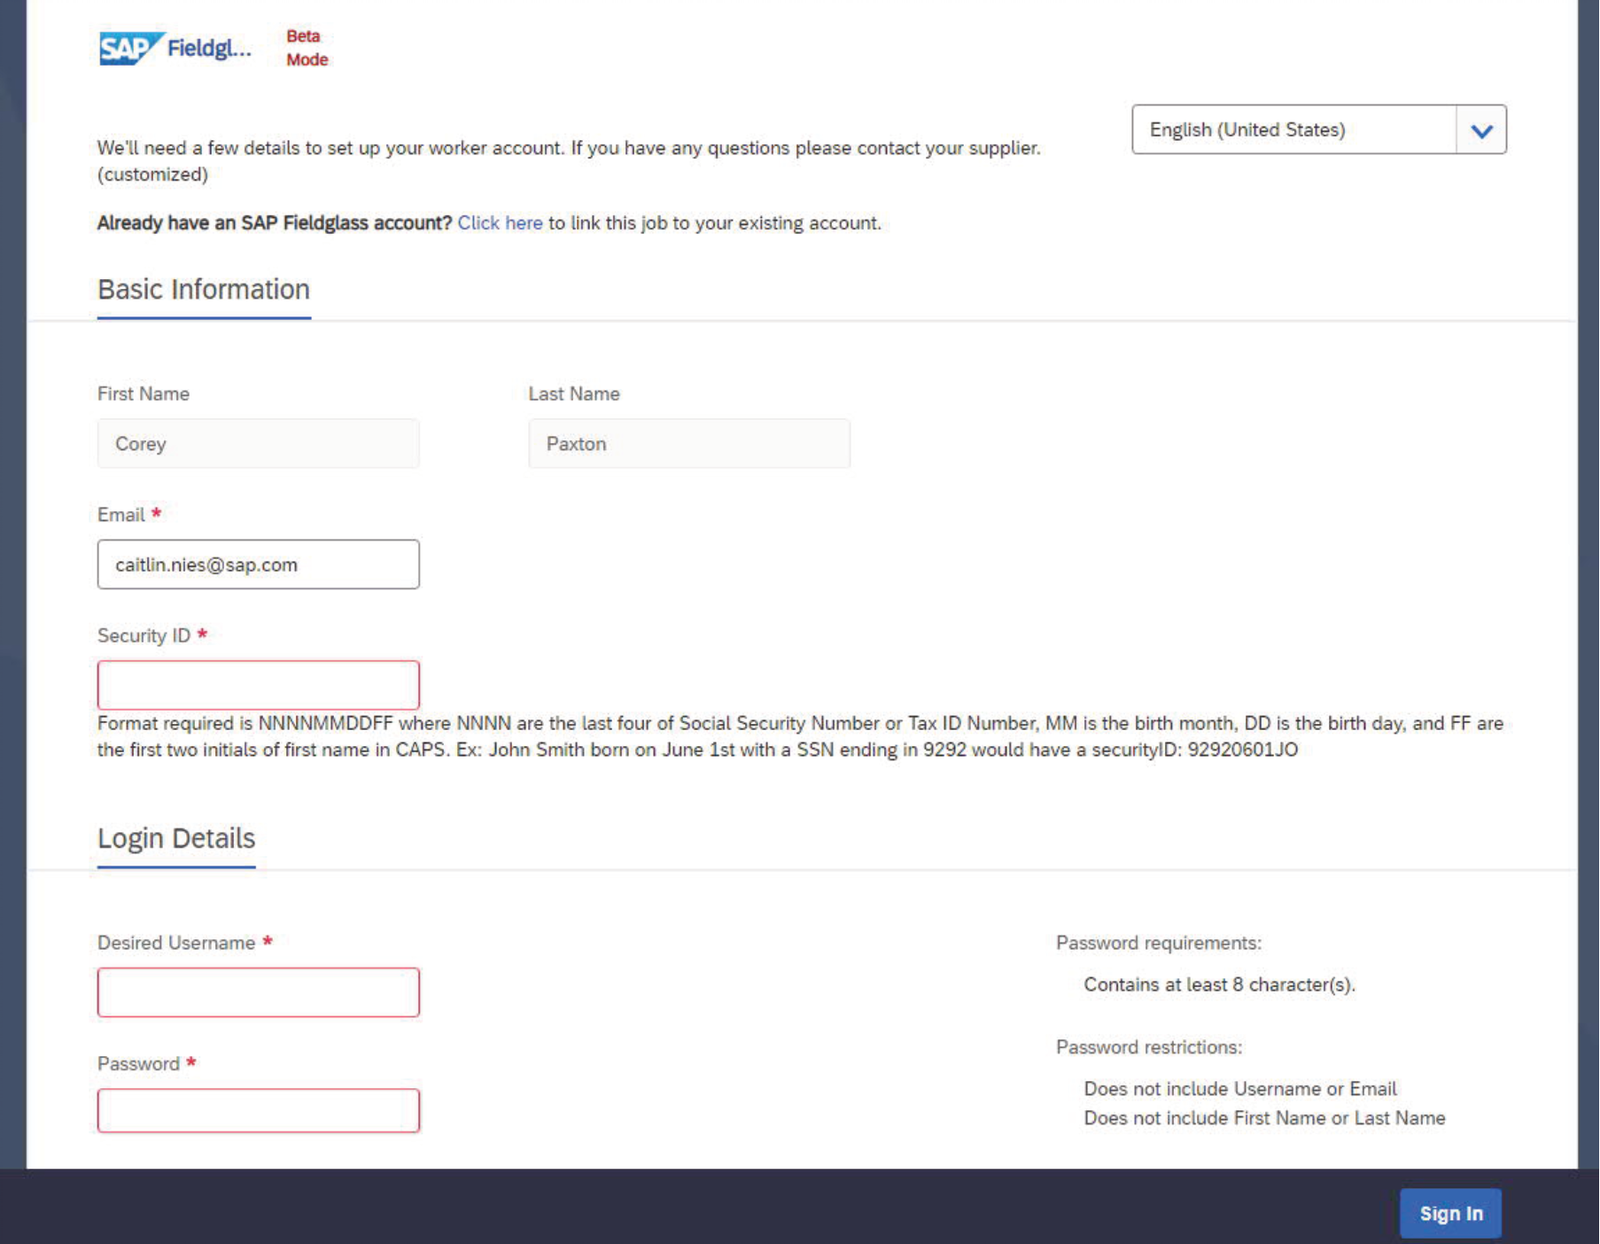
- If you currently have an SAP Fieldglass worker account, you can link a new account to an existingaccount using the Click here link located at the top of the page.
Note: Linking accounts will enable you to access all time sheets from one worker account. - Create a Username and Password.
- Click Sign In.
- Update your Locale Preferences (if necessary) and click Save. Select Don’t show this window again to prevent the Locale Preferences page from displaying the next time you sign in.
Sign in to SAP Fieldglass
After you have registered your account, you can log directly into SAP Fieldglass to enter your time, createexpense sheets, or edit your profile and preference information.
- Navigate to www.fieldglass.net from your internet browser (workers working with European data center customers should use www.fieldglass.eu).
- Enter your Username and Password.
- Click Sign In.
Edit my profile and my preferences
To update your contact information, enter a new password, or change your secret question and answer:
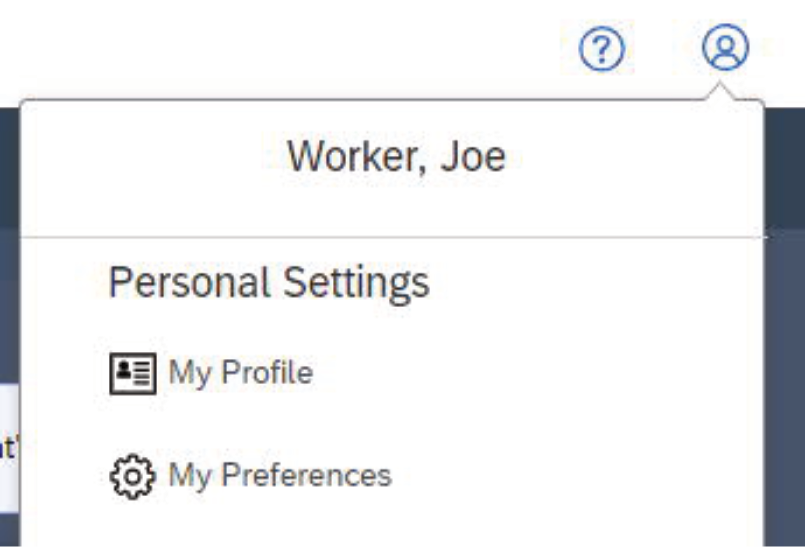
- Click on the user icon in the upper right corner of the page. Select My Profile in the menu that appears.
- To update your contact information, click Edit in the section where your name is displayed. Make the necessary changes and click Update.
- To change your password, click the Change Password link in the Account Information section. Enter your new password information and click Change.
To change the notifications that you receive by email:
- Click on the user icon in the upper right corner of the page. Select My Preferences in the menu that appears.
- Click Edit in the Messaging section. Select the types of notifications that you want to receive by email and click Update.
Submit time sheets
To enter hours worked into your time sheet:
- From the SAP Fieldglass Home page, click the Complete Time Sheet link for the desired period. You can also click View and then Time Sheets to view all your available time sheets. Select the timesheet for which you want to enter time.
- If prompted, select your related Task Codes from the Task Code List and click Next.
- Enter your hours worked on the time sheet.
- Click Complete Later to save your changes without submitting the time sheet. You can complete your time sheet at a later time by clicking Edit.
- When you have entered all your hours, click Submit. Your time sheet will be routed for approval.
Submit expense sheets
To create an expense sheet for billable expenses:
- From the SAP Fieldglass home page, click the Create Expense Sheet link on the left side of the page.
- Click an Expense Code. If you do not see the expense code you need, click the Click here link to find additional expense codes.
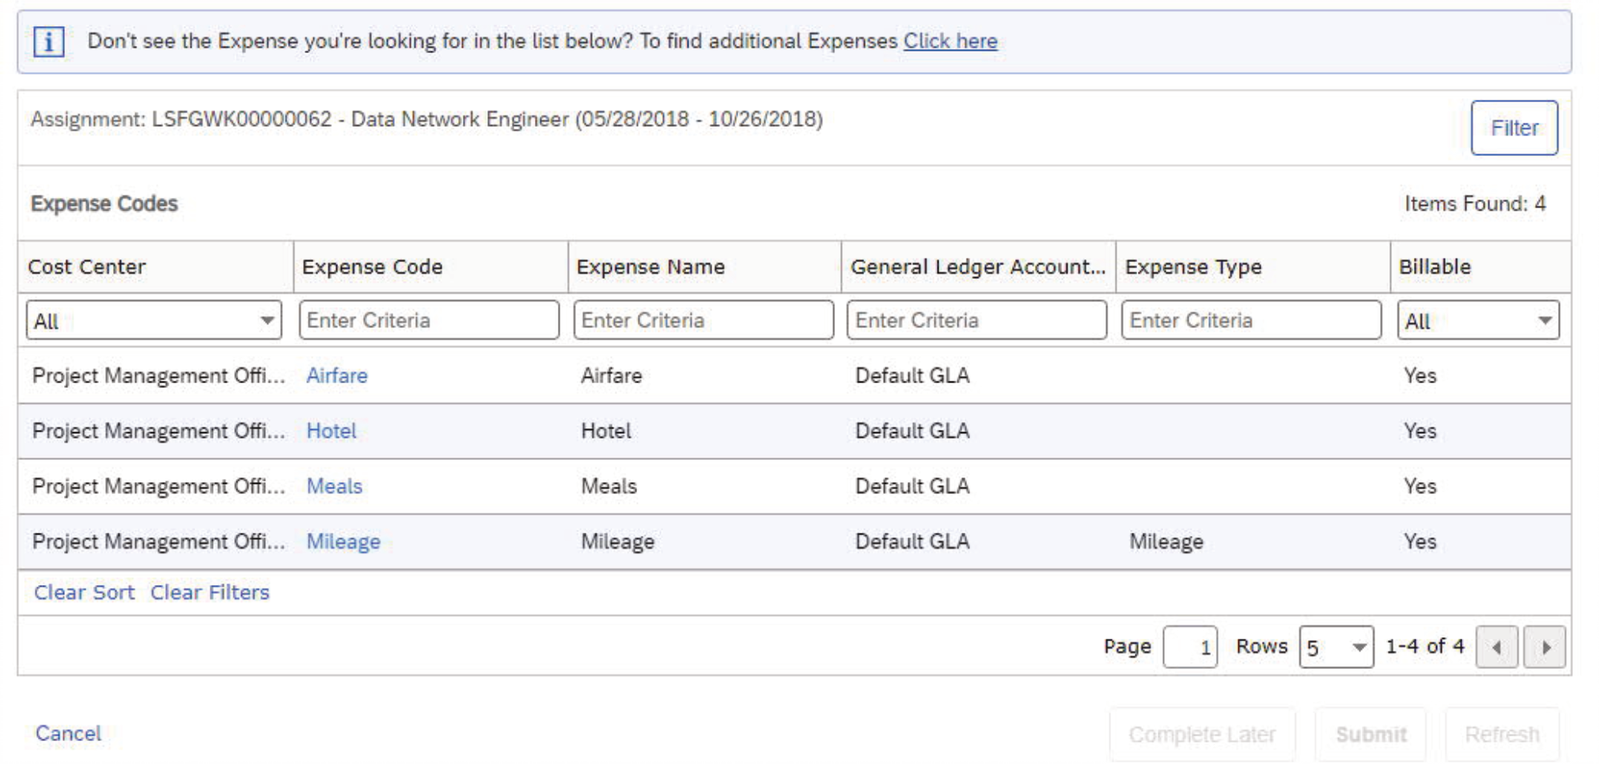
- Enter the Date, Merchant, Description, and Amount. Enter Comments if desired.
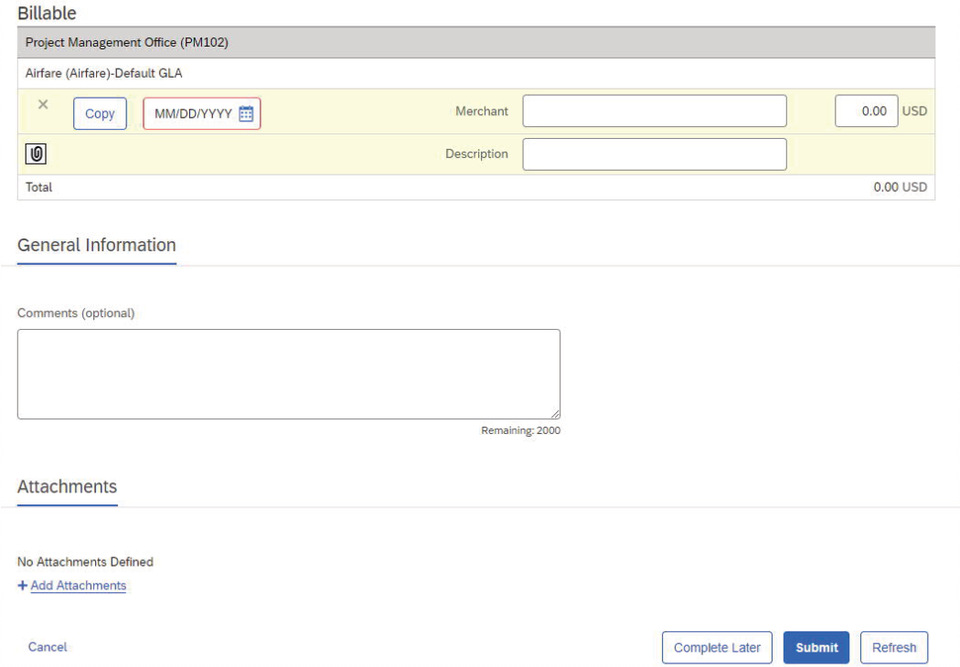
- To add another expense, click the appropriate expense code at the top of the page and enter the expense information.
- To attach receipts on individual line items, click the attachment icon (paperclip) for the expense.
- Receipts can also be attached by clicking Add Attachments in the Attachments section at the bottom of the screen.
- Click Complete Later to save your changes without submitting the expense sheet. You can complete your expense sheet at a later time by clicking Edit.
- When you have entered all your expenses, click Submit. Your expense sheet will be routed for approval.
View your time sheet history
To view the history and status of your time sheets:
- From the View menu, select Time Sheets.
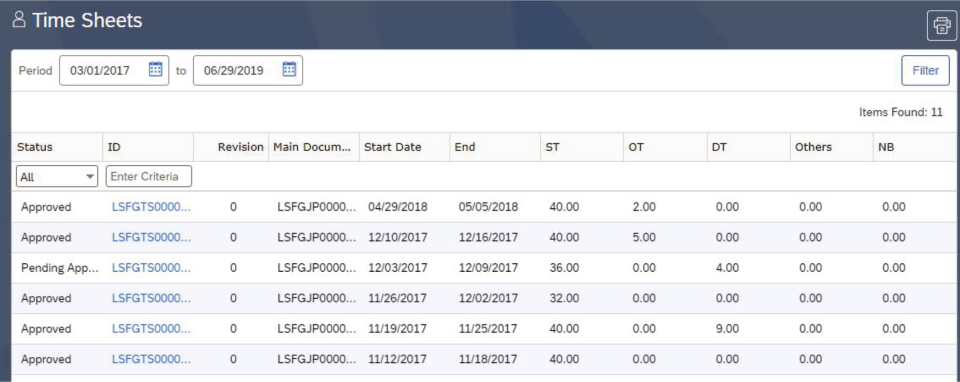
- The current status of your time sheets is displayed in the Status column. Use the Status field to filter the time sheet list for a specific status.
- Use the date fields and the Filter button to search for time sheets in a specific date range.
Withdraw a time sheet
If you notice an error on your time sheet after it has been submitted, you can withdraw the time sheet and make any necessary corrections, as long as the time sheet has not been approved. Time sheets that have not been approved will display in your Time Sheets list in a Pending Approval status. Once your time sheet is approved, it cannot be withdrawn.
To withdraw a time sheet:
- From the View menu, select Time Sheets.
- The current status of your time sheets is displayed in the Status column. Use the Status field to filter the time sheet list for those in Pending Approval status. Only time sheets in a Pending Approval status can be withdrawn.
- Click the ID of the time sheet you wish to withdraw.
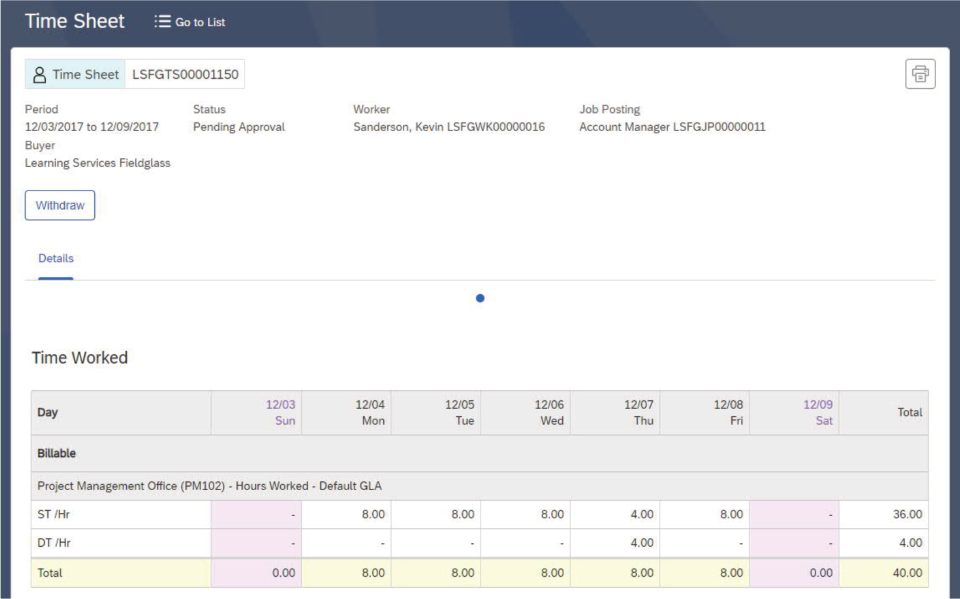
- Click Witdraw.
- Enter comments if desired and click Withdraw in the Withdraw Time Sheet dialog box.
- The time sheet returns to a Draft status. Click Edit to make changes and resubmit the time sheet.

